Saturday 21 November 2015

Image Option Portfolio

The Image Option Portfolio was part 3 of an assignment which was a portfolio of my own work based up a particular style of Photographer which was researched,   and then presented to the class.
I researched and drew inspiration from Christoph Gilbert, to innovate my own idea and then present my own body of work

Now for my own portfolio, using the pen Tool I cut out images of my on car, a  newly purchased RAV  as Toyota is in Gilberts stable of clients i thought this being an excellent choice to start with
This choice of style led me to the interest in Photo Manipulation which open the window and made my choice of which direction i would like to take in my careers much clearer 
I did do some others that didn't make it to the final image options folder
along with Troll and exploding shoes, eeesh what i thinking.


Now for my Image Option Finl images based on the styles above BY PAUL CARR 2015
hope you enjoyed my blog thanks for visiting, please be kind with te comments as i am only learning and still finding my way thank you


Hair Masking

Hair Masking was the coolest of the lessons learnt at Art School ( Not that all your lessons weren't cool  James)
being able to accurately select an object  by separating it from contrast using channels, is quiker and way more accurate than the Pen Tool could hope to achieve
Hair masking a model and placing him/her in a different background can be quite daunting at first but once mastered I never use anything else
First opened up image of model in photo shop
then selected channel with best contrast
On  skin Tones this is usually blue
Duplicate Channel
it is best if can be made a pure white background if possible 
In The Duplicate Channel, open up Levels and  make model  as black as possible without losing hair detail,
then paint the model black
now we have black silhouette  on a white back ground
select the channel to make selection
go to layers
add layer mask and now we have a selected layer, now we can open up back ground from second image
select and copy and paste background to model
now model appears on new background
select layer mask by clicking
choose refine edges, feathering to tidy up edges
a good tip to tidy the white edges of the end of hair is to create clipping mak the clone tool to run
over hair, this way the white edges are replace with real hair color

The Pen Tool

I must admit this tool for me was challenging at first to say the least, but once mastered, is one of the most precise tools for making composts,
I found this tool very handy in my Image Options portfolio, where cutting cars out and placing them in the sky, was a snap.
also as you can see in the vesper relocation and public sculpture project this worked  treat
and with the help of refining mask and feathering techniques you would  swear they were never composite images.
I also found that for me to open up the image to be selected to100 percent and clicking carefully around the subject, is not strictly the preferred technique
where by clicking and dragging and pressing control ( Win ) 
s the purist and correct way does give a far superior result but I found so time consuming if many objects are o be done this way
I've always thought if a job needs to be done, what ever way best for me and more clicks to the path then edging with masking brush with no hardness work just as well for me, or even refining edges once cut out,
The  Vesper Image below was originally shot in the studio, and a separate location shot taken, then the Vesper cut out using the Pen Tool, and then a composit made adding shadows Wallah


My Final Image Portfolio 2015

This portfolio of images is a portfolio  of the best and innovative collection of my work which I would  then go on to show to a prospective client or gallery in the future.
The images demonstrate through photographic techniques I have learned,  I have been  able to demonstrate my own style and innovative use of photographic techniques
I decided to do what I love and do best, in this collection of images to show color , lots and lots of color spread over as much as a surface are as possible. These full size " Trippy Murals" as I have heard them best described, started life as a normal Photograph taken at some time during my  Diploma of photo Imaging,
The canvas size is determined by 8 portrait canvases stitched together in photoshop to make a Panoramic size Canvas
This done automatically using Photoshop, Photomerge etc
once the canvas is completed other photo are mixed and merged using the Liquid Filter, and because the the length is exactly 8 photo Images long, scaled down of course all the images panorama will be exactly the same size
This is now here the fun begins
The first panoramic image is done , then duplicated then the duplicate is reversed and mixed around
then a layer mask  is added  and blending mode chosen etc
then we a have a second panorama and the procedure goes on till had 12
The idea was to show to Evolution of one panoramic plate to the next, each being totally different to the next te collection of images are as follows 


Friday 20 November 2015

Photograms

Not al, digital Photography involves a camera,
but it just happens that these examples were using a Nikon D5100 and Placing Objects on a Light  Also that great photograms can be made placing objects under a Flatbed Scanner
in this example objects were bought from home a photographed on a light table in the studio and then using Photoshop using Masking techniques achieved some spectacular results (at least I thought so)
This was a great way to learn and discover masking techniques by choosing, and manipulating different colors could be added
and by selecting different opacities and blend tones an endless variety of effects can be achieved
 
How I made a digital photogram
set up at home

Photograms are very different images to standard photos. Traditionally they were created by placing objects on a sheet of photographic (light sensitive) paper. The paper is then exposed, which turns the paper black, except for where the objects are blocking the light.
 
Photogram
Objects that are translucent let through some light, and so appear in shades of grey, while objects that are opaque appear as solid white.
The effect of a photogram image can be replicated using a digital camera to capture the image, with no photographic paper needed. You will need:
 •Digital camera with manual exposure mode
•Glass or clear perspex that you can rest your objects on (or a lightbox).
•White paper
•Light source, e.g. Speedlight flash and a way of triggering it off-camera, or a small continuous light source.
•A tripod - not essential, but very handy.
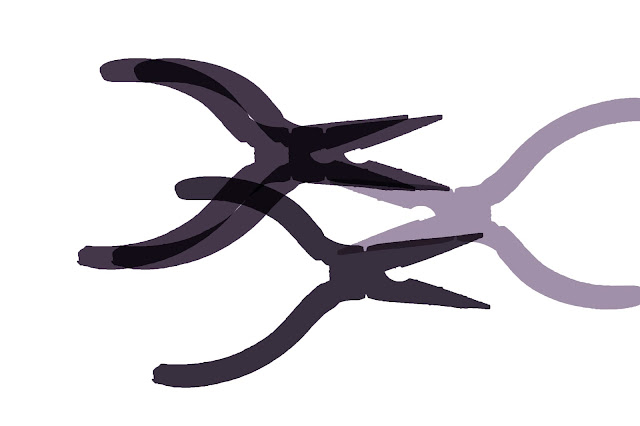
Normal photo of Pliers
Photogram of Pliers and toothbrush - note the X-ray style effect
To create a photogram image,  create a photo with a very bright background. This will produce a photo with a white background, and black silhouetted objects, the opposite of a photogram. This image can be pleasing by itself, but to get the true photogram effect we can later invert the image in Photoshop
using a  light box, or light table, this is ideal to use as a bright background for placing your objects on. or use  a light box, then  to replicate the effect. if you don't have glass table here is  simple solution
use a piece of clear Perspex placed on the edges of two boxes, like a bridge.
On top of the Perspex  put a piece of white paper. The paper shouldn't be too thick, as it needs the light to shine through it.
Underneath the Perspex, on the floor,  placed a Speedlight flash with a radio trigger attached. The flash to be  pointed upwards towards the bottom of the Perspex. When the camera shutter is  pressed, the radio transmitter in the camera's hot shoe triggered the flash, which blasts the underside of the Perspex / white paper with light. The camera then captures the photo of the bright background, with where objects are placed on the background appearing dark.
 The apperature was set to f11 1/124second ISO 200


Painting With Light

Painting with light, was setup in the kitchen at my home with a tripod and using a Nikon D5100 with an 55-200 mm lens ,
the props that were used on this occasion were some Teddies, glass bowl and oranges to give the effect of miniature Jack Of Lanterns as it was Halloween when the shot was taken, seemed most appropriate ate the time,
Simple light sources were used as led torches,
The camera was set up on the tripod and an exposure of 8 seconds under complete blackness with aperture of F5.6
A painting with light as shown below was completed in a studio with a blue filter over a torch phone
 
I found these as a great guide to achieve good results in painting with light
 
Don’t try to paint everything with the same light.  It will look really odd and flat.  
 
  Chose a dimmable flashlight with an adjustable beam for best results. 
 Many flashlights have adjustable beams, such as Mag-lights, but few flashlights can be dimmed so that you can use just the right amount of light on every part of the photo. 
 
 Be careful with noise.   but long exposures also create more noise. 
You’ll need to take more than one photo.  .


Soft Light Photography

I found this type of procedure an interesting method of turning  a an ordinary photo into a dream like photo.
It really helped me master the, concept of layers and mask, which was a conept I was truly falling behind.
the great thing about Soft Light  Portraits is the amount of different effects that can be applied to different layers and masks to bring it all together in a final composition in the end photo,
I personally like the Blending modes and use of gradients over a layer mask to totally change the atmosphere of the original
Soft light can also dramatically change the mood giving a dream like mythical appearance,
I can see my self using this as a Personalised gift or card making serving with the recipients picture on the front and adding dreamy soft light wishing happy birthday or such other greetings
 
The gradual tones of the foliage in the background were achieved by a gradient over a layer mask and changing the blending mode and revealing underneath
 
So what is soft light?  It is a light which has a wide gray zone.  It means that the light won’t cause harsh shadows under people’s noses, or under their chins, etc.  Soft lighting does not show texture (such as pimples, wrinkles, blemishes, leprosy, etc) as well as hard light.  This is one reason why soft light is generally more amenable to portrait photography, because we want the light to wrap around the texture on our skin so we don’t show off our blemishes.  Remember: the softer the light, the wider the gray zone.  The harder the light, the narrower the gray zone.
 
What makes light soft?
 
One thing, and one thing alone makes lighting soft: size.  It is not about how bright the light source is, nor how diffused the light source is, nor anything else.  It’s all about size.  The larger the light source, the softer the light.  This explains when photographers shoot  flash units into umbrellas.  The flash unit itself is only a few inches wide, but when you shoot it into an umbrella, it becomes 43 inches  in diameter!  Making the light large makes it soft.  The same is true with the relative size.  If you’re shooting a portrait of someone and the light is too hard, do you put the flash closer or further away from the person?  It may surprise you that the answer is to put the flash closer to the subject.  When the light is closer, it seems larger than if the light is further away.  This relative size of the flash also affects softness.
What about natural light outdoors?  Now you know why shooting portraits, or even wildlife, in mid-day lighting from the sun is so horribly ugly.  The light, while giant in terms of actual size, is only a puny little dot in the sky.  This small relative size of the sun makes for hard light.  Portrait photographers always hope for a cloudy day when shooting outdoors.  The clouds spread the size of the sun to make it relatively larger, which produces softer light.
The above explanation gives a fundamental knowledge of why and how they get soft light in the studio,
which is handy to know also when it comes to editing and achieving the same effects in Photoshop